
Williamsville Bridge Replacement: 2001-2010
[WGN 45-13-05]

Williamsville Bridge Replacement Index
- VAOT Historic Bridge Committee Proceedings: June 28, 2001
- VAOT Historic Bridge Committee Proceedings: July 18, 2001
- VAOT Historic Bridge Committee Proceedings: February 14, 2002
- Williamsville Bridge Update: November 2009
- Williamsville Bridge Update: December 2009
- Williamsville Bridge Update: January 2010
- Williamsville Bridge Update: February 2010
- Williamsville Bridge Update: March 2010
- Williamsville Bridge Update: April 2010
- Williamsville Bridge Update: May 2010
- Williamsville Bridge Update: June 2010
- Williamsville Bridge Update: July 2010
- Williamsville Bridge Update: August 2010
- Williamsville Bridge Background by Robert McCullough
Williamsville Bridge Update: November 2009
November 15, 2009
After years of analysis and discussion, work is going forward on the Williamsville Covered Bridge. In summary, the decision was made to build a replacement for the "Tired old bridge", scheduled to be demolished in 2010. For the history, click on the links above.
The project for the construction of the replacement bridge was awarded June 10, 2009, work to begin August 3, 2009 and be completed October 4, 2010.
The engineering cost of construction estimate is $1,290,000. The winning builder was Alpine Construction of Schylerville, NY with a bid of $1,020,000.
Photos of the old bridge and the construction area follow
Ray Hitchcock
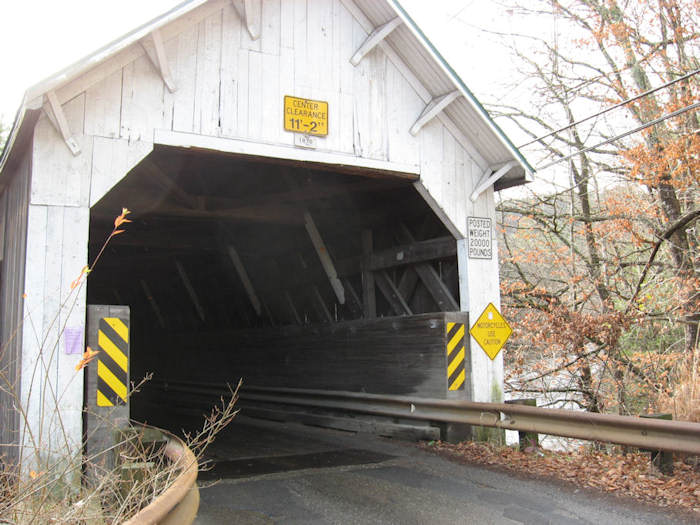
Photo by Ray Hitchcock
November 15, 2009
Williamsville Bridge east portal. Note the huge supporting glulam girders.
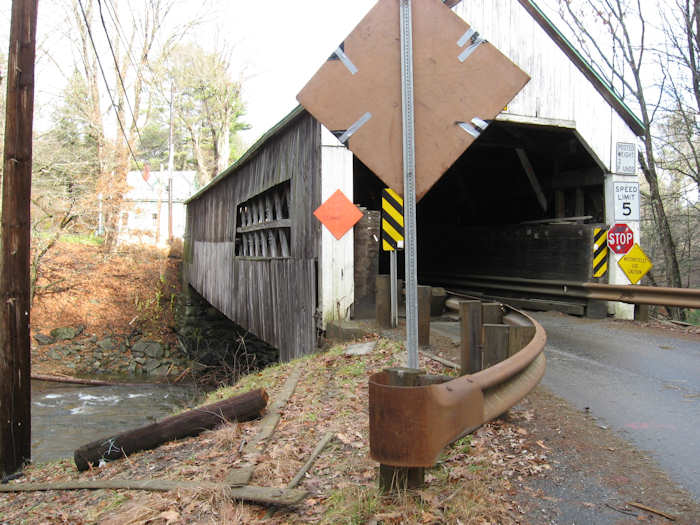
Photo by Ray Hitchcock
November 15, 2009
Williamsville Bridge west portal. Note the rack in the north side.
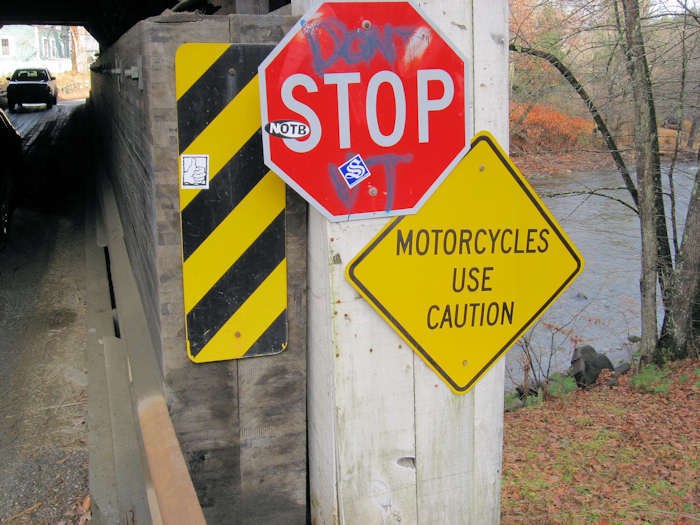
Photo by Ray Hitchcock
November 15, 2009
Signage at the west portal
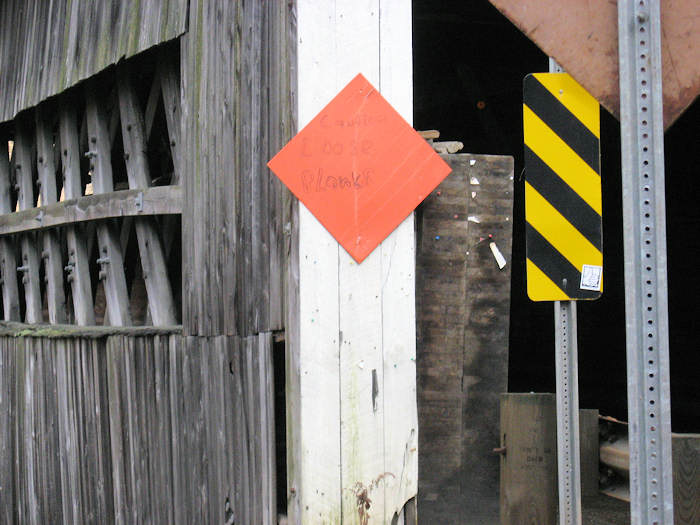
Photo by Ray Hitchcock
November 15, 2009
Township sign - "Caution loose planks"
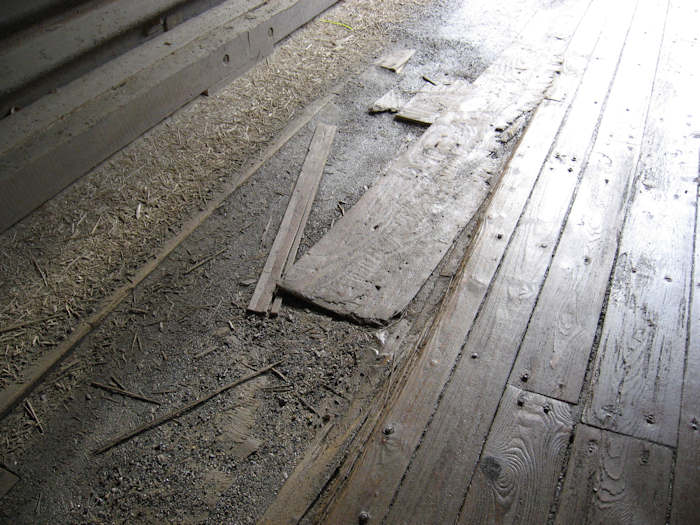
Photo by Ray Hitchcock
November 15, 2009
Decking - east end
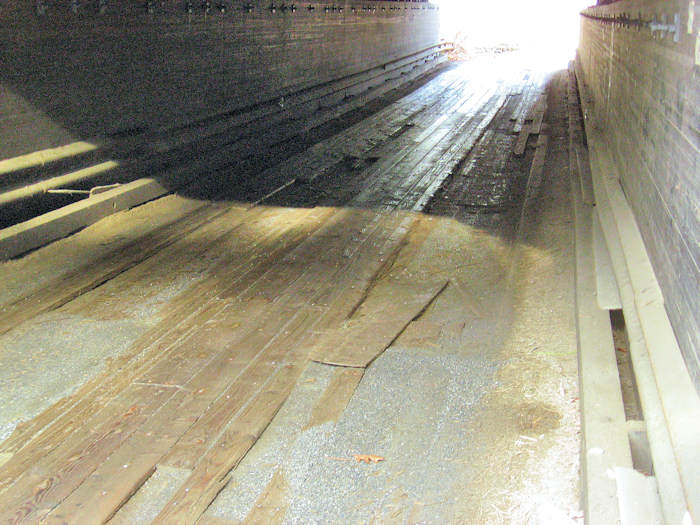
Photo by Ray Hitchcock
November 15, 2009
Decking at west portal
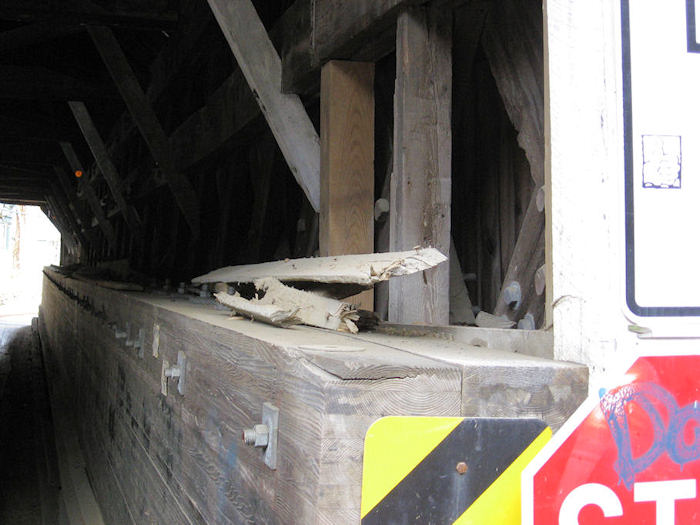
Photo by Ray Hitchcock
November 15, 2009
Loose planks piled on glulam support
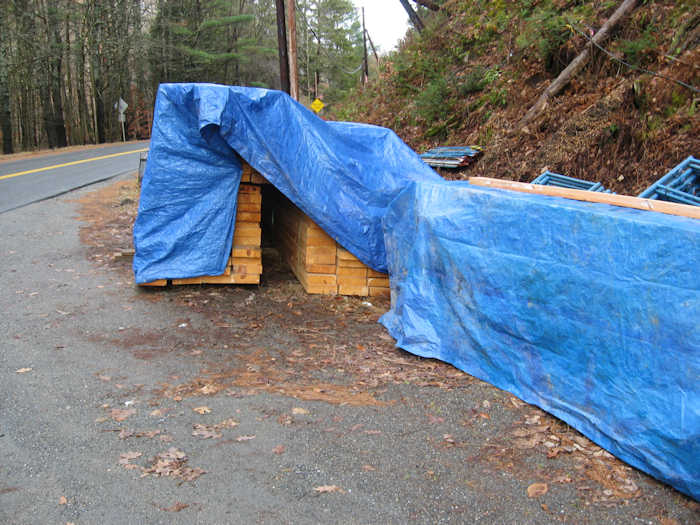
Photo by Ray Hitchcock
November 15, 2009
Materials for the replacement bridge staging area
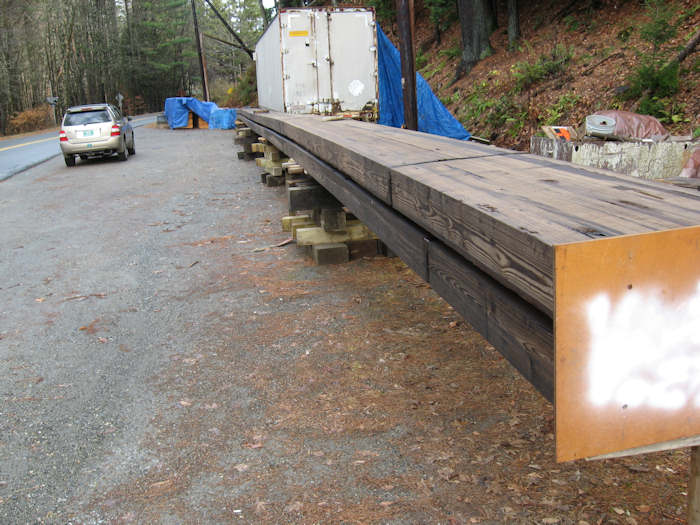
Photo by Ray Hitchcock
November 15, 2009
Glulam for the lower chords of the replacement bridge
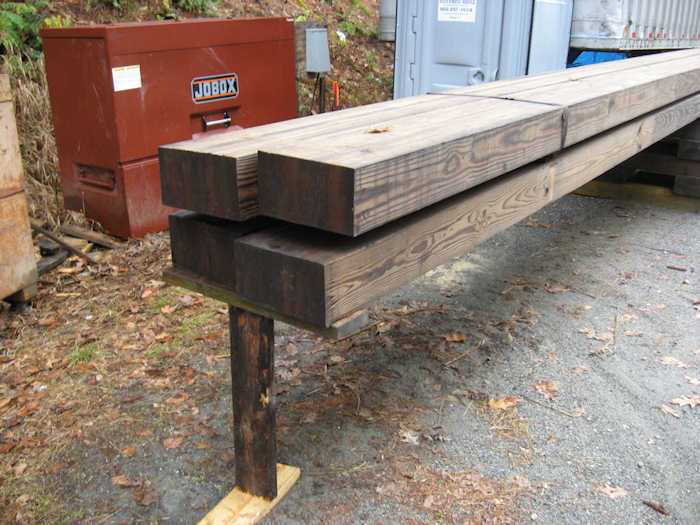
Photo by Ray Hitchcock
November 15, 2009
These glulam beams will replace eight runs of spruce members in the lower chords of the replacement bridge
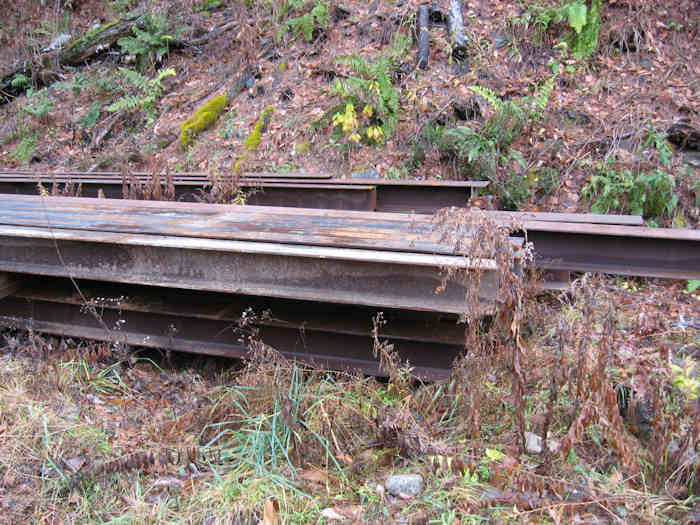
Photo by Ray Hitchcock
November 15, 2009
Steel for use in construction staging area, laying out the trusses
November 23, 2009
The next three weeks will be spent building the lattice trusses and floor system for the new Williamsville covered bridge. A truck will be used to move it to the site once the old bridge is disassembled and removed, around July 10, 2010.
I visited briefly with Jim Ligon at the site this afternoon. Attached are a couple of photos showing the challenge of a very small constructions site on a busy highway. The work area was created by blocking off half of the highway a few hundred yards west of the bridge.
They were making good progress on the first lattice just as the next surge of rain began. It looked like Jim had a crew of 4-5 working. They should make good progress over the next few weeks.
Tom Lacky, P.E., Vtrans Project Civil Engineer, designed the replica bridge with help from John Weaver, He said. "I tried to follow the original bridge as much as I could. It was interesting crawling under and climbing on the old bridge to find the construction details and try to follow them."
I have also attached a photo of the steel bridge that will be used for the alternate crossing. I can see why natives are up in arms with the planned detour. The alternate crossing, rated at 24,000 lb, is at the end of a very narrow one lane road. Also quite steep. No other alternative is apparent.
Ray Hitchcock
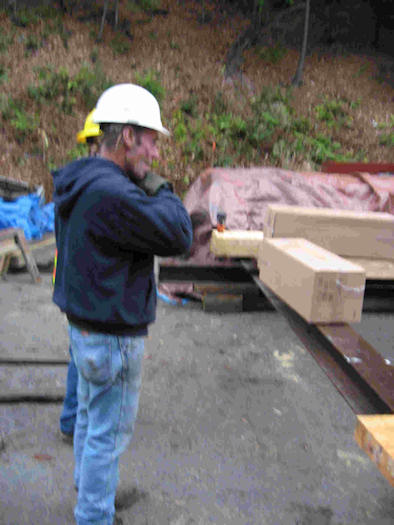
Photo by Ray Hitchcock
November 23, 2009
Jim Ligon, Alpine Forman, Supervises build.
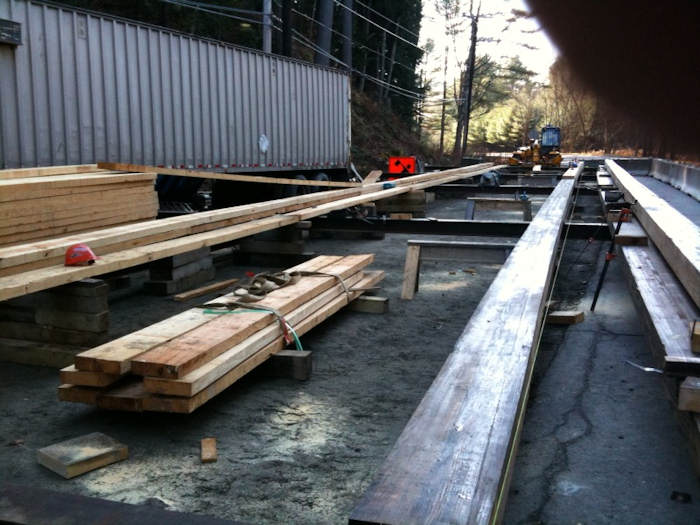
Photo by Ray Hitchcock
November 23, 2009
Layout of the first truss has begun.

Photo by Ray Hitchcock
November 23, 2009
First truss assembly progresses. Note the built-in camber.
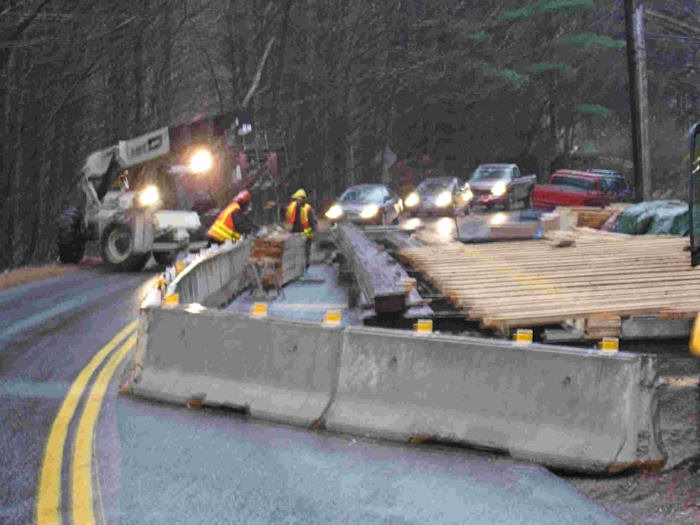
Photo by Ray Hitchcock
November 23, 2009
Traffic routed around work site.
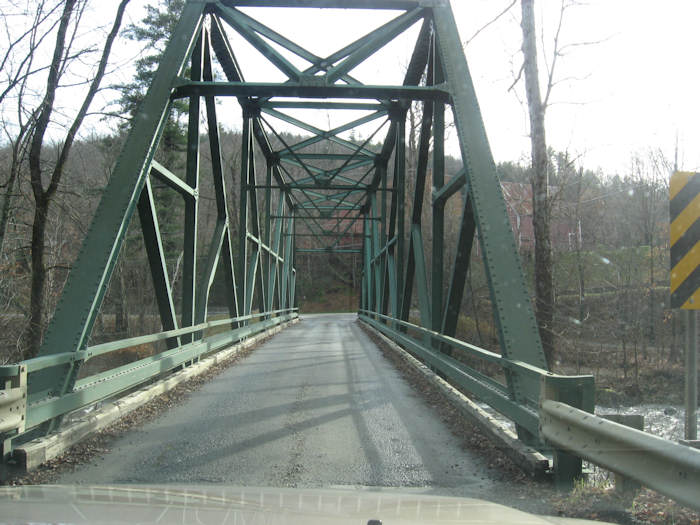
Photo by Ray Hitchcock
November 23, 2009
The alternate crossing, a one-way bridge rated at 24,000 lb.
The Williamsville Covered Bridge Update: December 2009
December 4, 2009
Work has progressed on the first lattice to the point of drilling and installing tree nails. I would say about 1/3 of the tree nails are in. We did have heavy rain today and yesterday.
I imagine the crew is getting a long weekend. It's a busy highway; I saw about two dozen cars, two box trucks, and one motorcycle in the 15 minutes I was there.
I am curious as to why the glulam for the bottom chord? Does it have superior strength properties? It has also been a while since I did any work with structural strength of wood in various configurations, so I asked Tom Lacky, the designer of the replica. Tom replies;
"The bottom chord gets the greatest axial stress of all the chords. It's like a bottom flange of a girder. A glulam chord has greater axial strength than a timber chord.
"A glulam chord is also continuous, unlike the timber chords. Since the chord timbers are only 24 ft long, the original builders used pairs of timbers on each side of the lattice, so they would always have at least 3 members at a splice. This makes the structural width of a timber chord effectively only 3/4s as wide as the glulam chord.
"I would have liked to use timber for the bottom chord for authenticity, but the glulam chord will help the bridge resist modern truckloads."
Ray Hitchcock
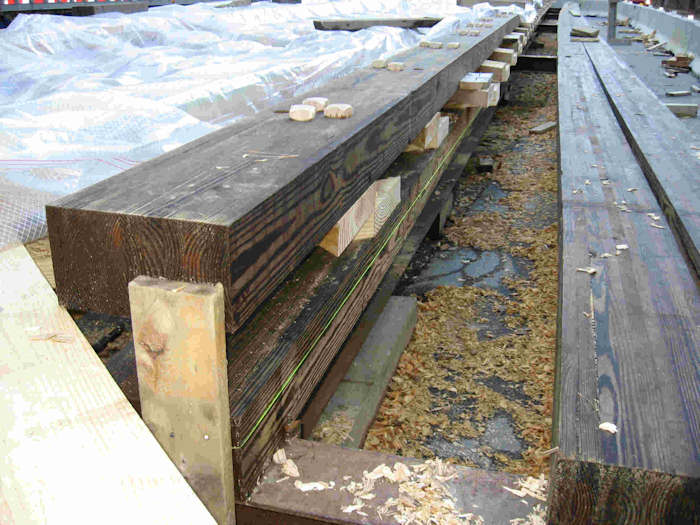
Photo by Ray Hitchcock
December 4, 2009
The west portal end of the truss - the glulam bottom chord.
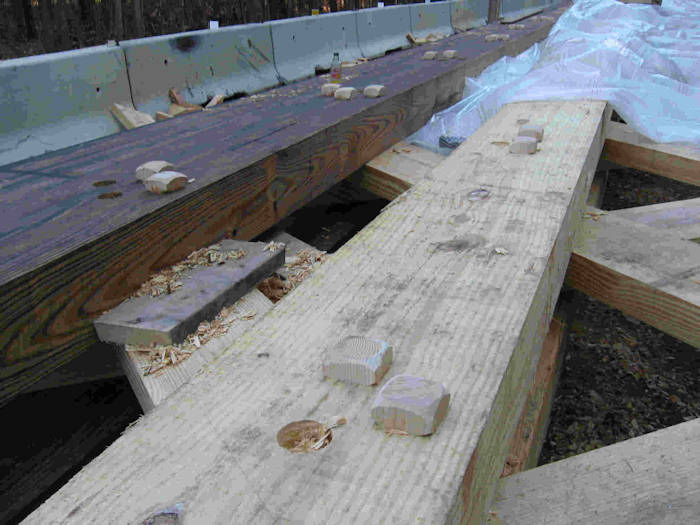
Photo by Ray Hitchcock
December 4, 2009
The west portal end of the truss - the southern pine upper-bottom chord.

Photo by Ray Hitchcock
December 4, 2009
Unfinished lattic at east end of truss.
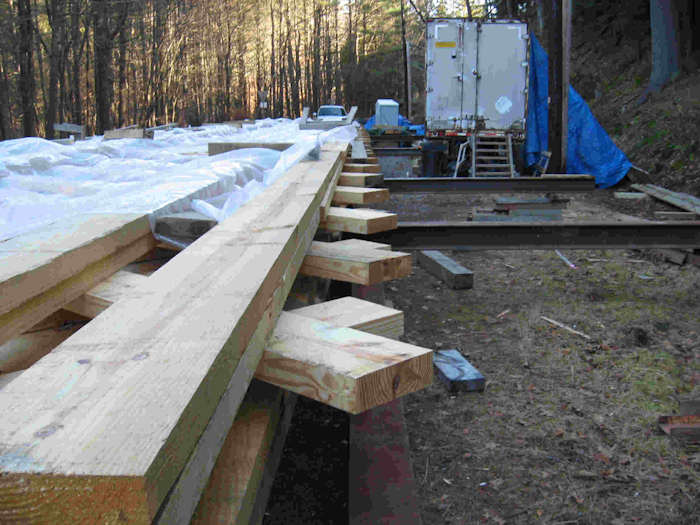
Photo by Ray Hitchcock
December 4, 2009
The top chords at the west end, ready for drilling.
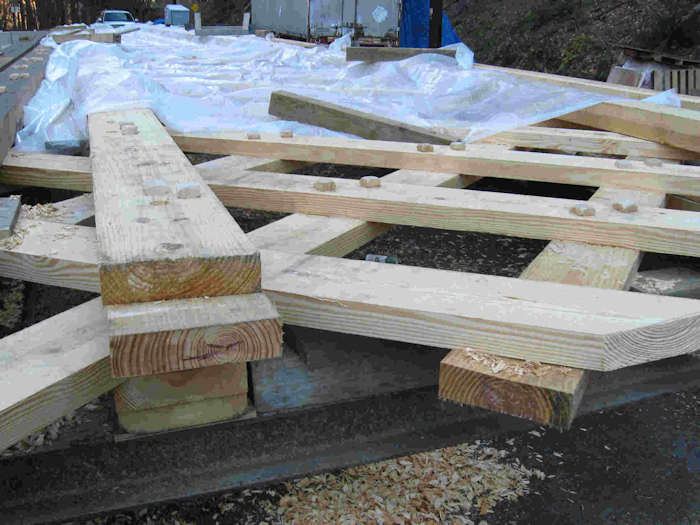
Photo by Ray Hitchcock
December 4, 2009
View of truss from west end showing work on lattice and upper and lower chords.
December 9, 2009
Here are a couple of pics from Williamsville. The south truss is nearly complete. The snow pic was taken a few minutes ago.
Jim Ligon
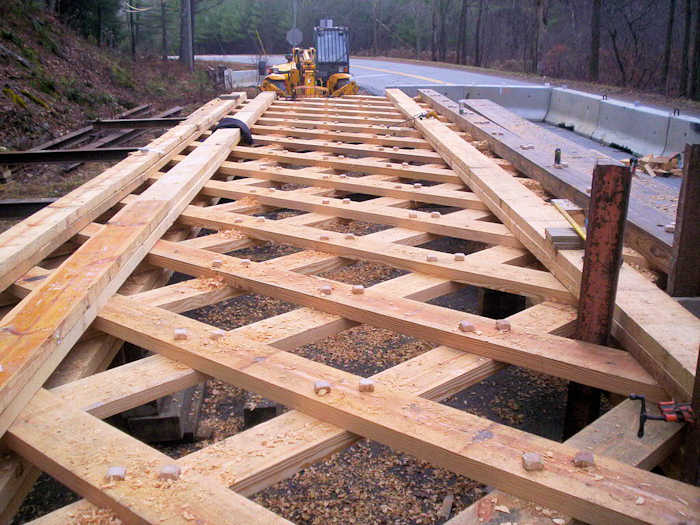
Photo by Jim Ligon
December 9, 2009
South truss nearly complete.
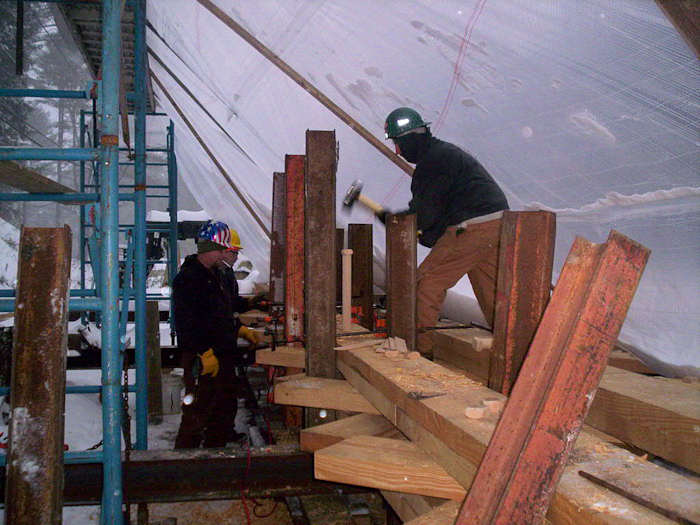
Photo by Jim Ligon
December 9, 2009
Starting a tree nail.
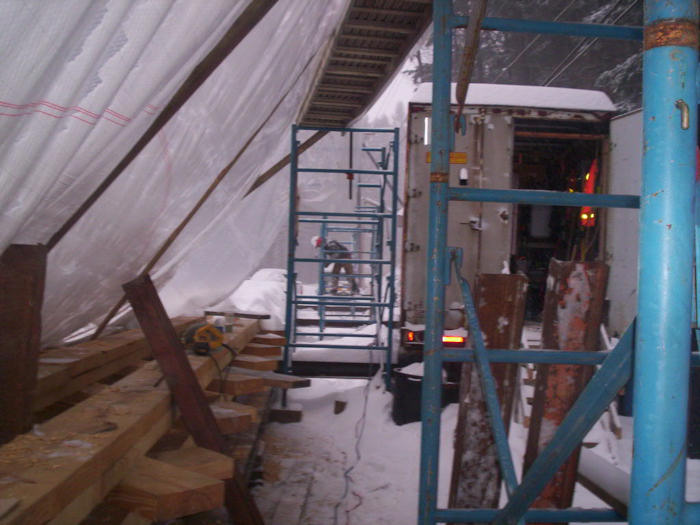
Photo by Jim Ligon
December 9, 2009
Frosty workplace.
December 17, 2009
We picked the first truss to vertical today and installed the floor beams. More pics to follow. The process went without a hitch. We closed the road after the morning school bus run and reopened it for their afternoon run - but the pm buses never showed up? The road was open to full traffic an hour earlier than the Town of Newfane had asked for.
There was no dead load deflection from the flat built to vertical, in fact we shimmed our midpoint blocking a quarter inch or so for a tight seat. We'll pull the shim tomorrow and let it relax.
Next step is install trunnels from the outside in, which we couldn't do when the truss was flat. At the same time we'll install lower diagonal bracing, add a temporary working deck, cover ourselves up for the winter and build the 2nd truss on the flat on top of the temp deck
A big thank you to Mother Nature for only barking at us twice in the last month 🙂. But the first one had a little bite to it too...
I'm very proud of our work, so is the very select nitpickky crew I have working for me. They bite each other at night after work on just who did the best job today. And tomorrow's another day. Gotta tell ya, it was a nice feeling to see all the guys at the end of the day stand back in awe and look at what they had accomplished in the last month!
Jim Ligon
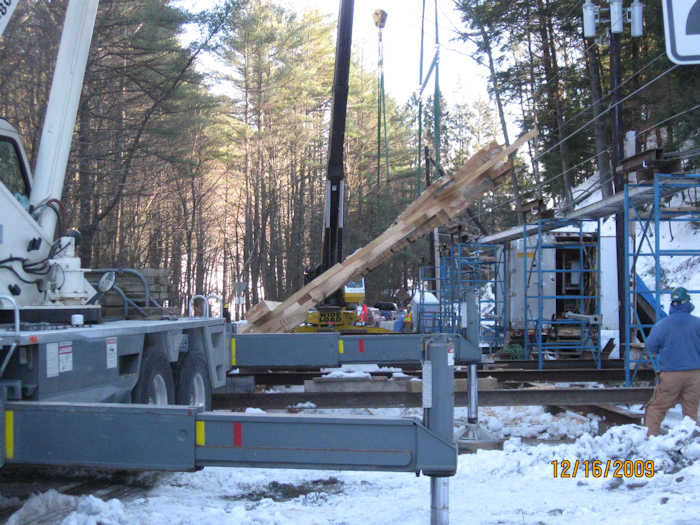
Photo by Jim Ligon
December 17, 2009
The south truss is complete, time to stand it up.
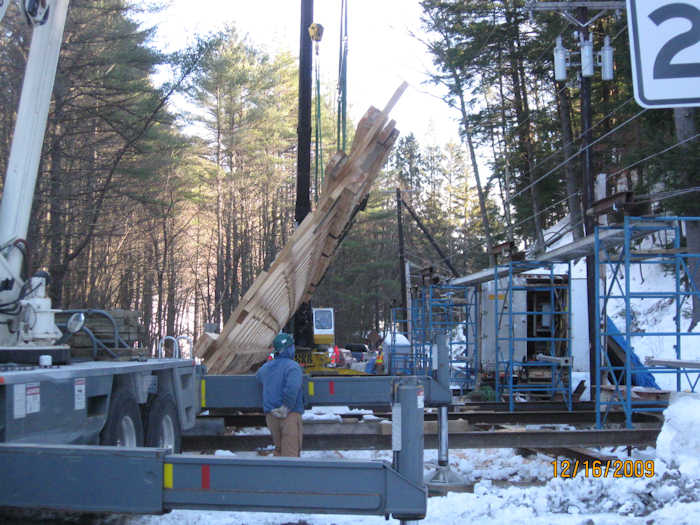
Photo by Jim Ligon
December 17, 2009
The process went without a hitch.
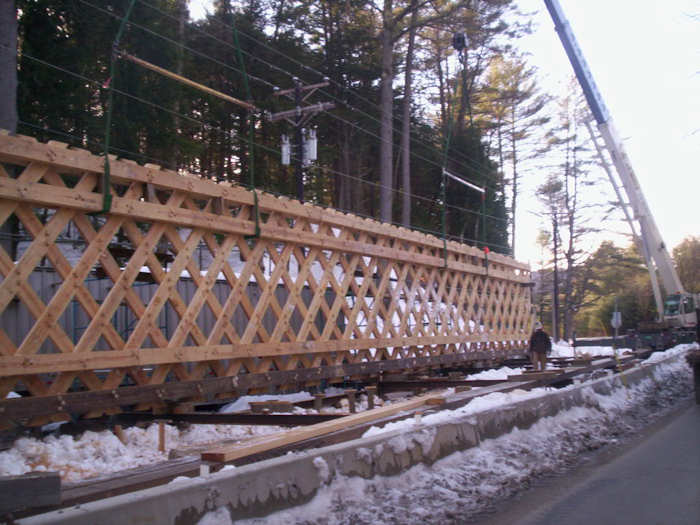
Photo by Jim Ligon
December 17, 2009
There was no dead load deflection from the flat built to vertical (the truss kept its built-in camber).
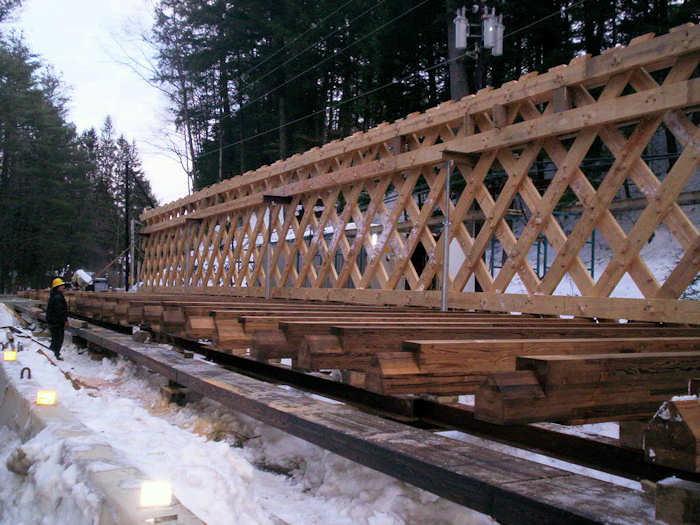
Photo by Jim Ligon
December 17, 2009
The second truss will be built atop a temporary deck on these floor beams.
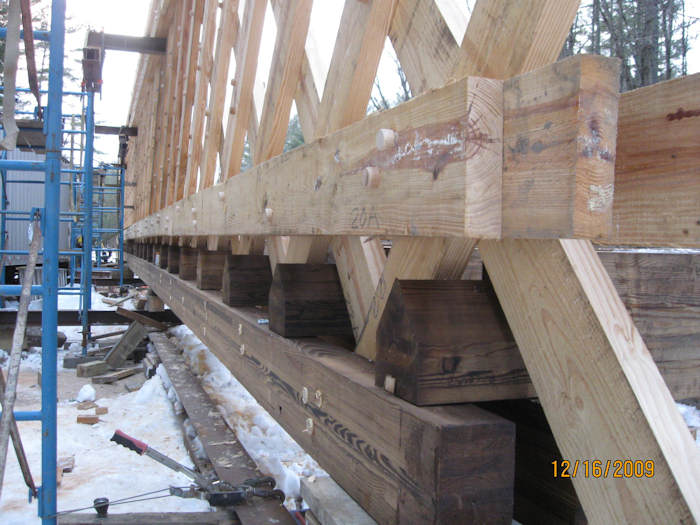
Photo by Jim Ligon
December 17, 2009
What was and what is today - from flat to vertical and all the floor beams installed too 🙂
The Williamsville Covered Bridge Update: January 2010
January 4, 2010
I made a quick pass on the way to a meeting in Brattleboro yesterday afternoon. The fellow pictured was drilling holes in the lattice. By the time I got out of the traffic flow and got the camera out he was done with that hole.
He indicated that they would be finished with the second lattice and have it standing within two weeks.
The decking on the current bridge continues to disintegrate. It makes one a little nervous crossing it, in the hope that all the spikes and lag bolts are pointed down.
Ray Hitchcock
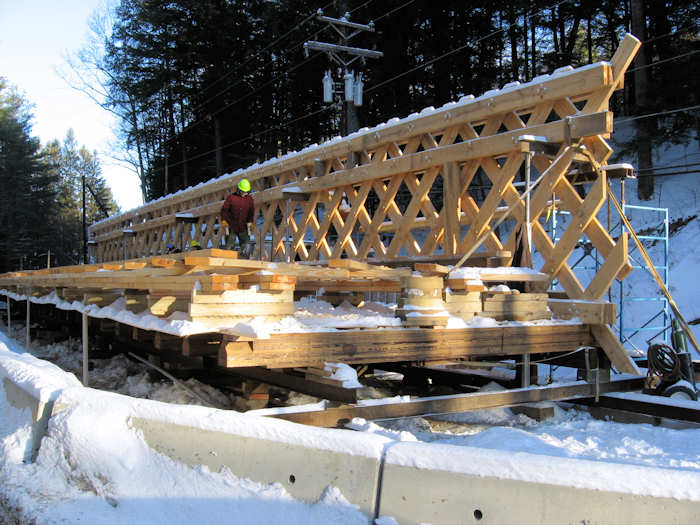
Photo by Ray Hitchcock
January 4, 2010
The fellow pictured was drilling holes in the lattice.
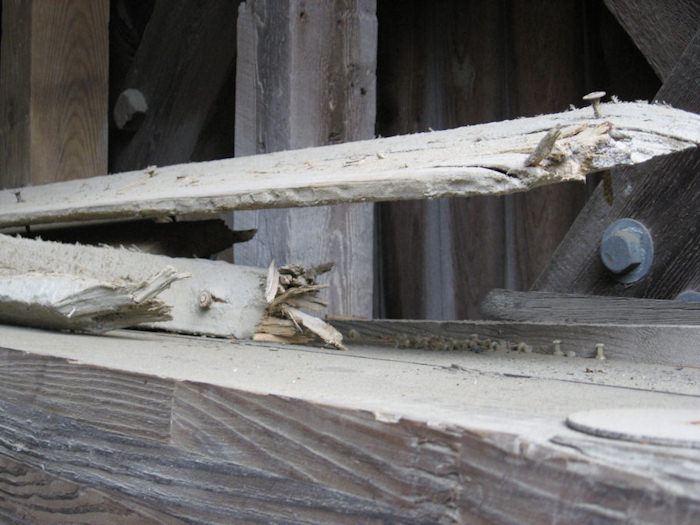
Photo by Ray Hitchcock
January 4, 2010
Loose planks piled on glulam support in original Williamsville Bridge
January 19, 2010
Hi!
I have discovered that friday is not a good day to visit Williamsville Bridge. I was hoping to catch the crew drilling holes and driving the wood nails. They can use a maul effectively while driving the wood nails on a flat surface. The Worrall crew has a more awkward swing and it will be interesting to see the jackhammer device they are "inventing" It would be nice to compare the two methods.
Here are are a few pictures without people showing a nearly completed second lattice.
Ray Hitchcock
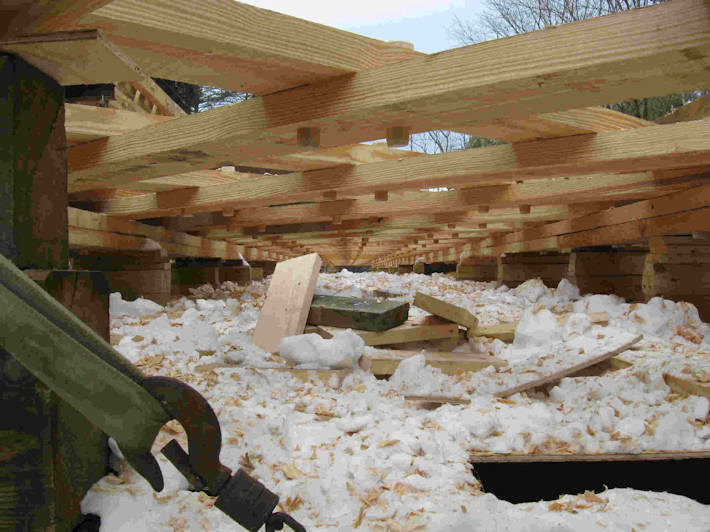
Photo by Ray Hitchcock
January 19, 2010
Second lattice truss, full length.
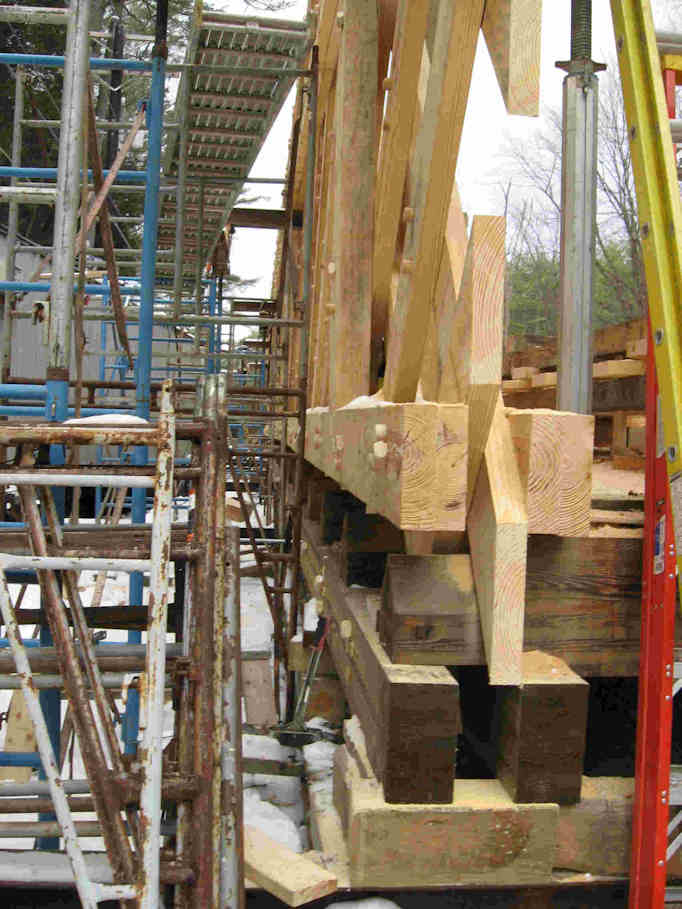
Photo by Ray Hitchcock
January 19, 2010
The first truss, standing.
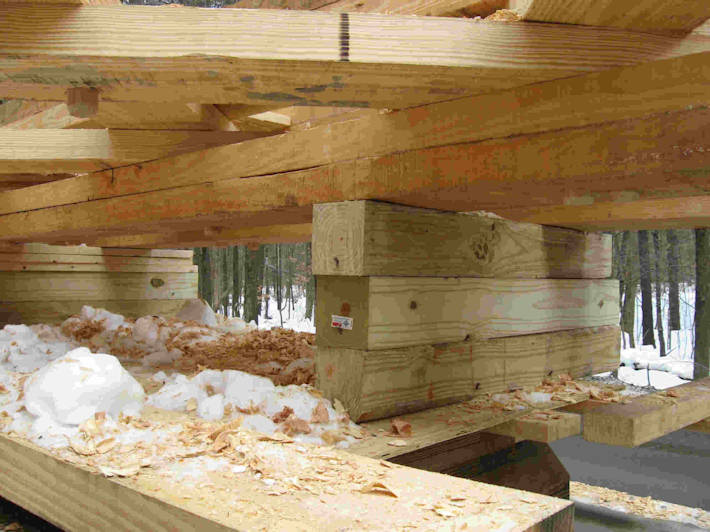
Photo by Ray Hitchcock
January 19, 2010
The second truss supports.
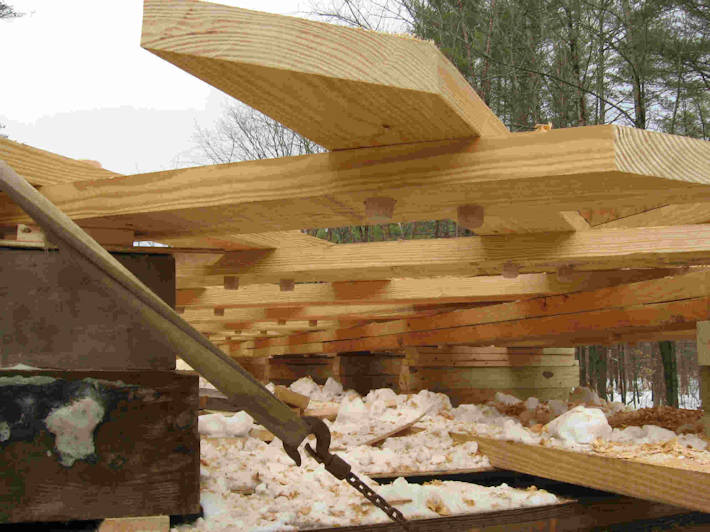
Photo by Ray Hitchcock
January 19, 2010
The second truss detail.
January 21, 2010
Hi Joe,
We stood up the second truss today and installed tie rods underneath and tie beams overhead. More pics over the weekend.
Jim Ligon
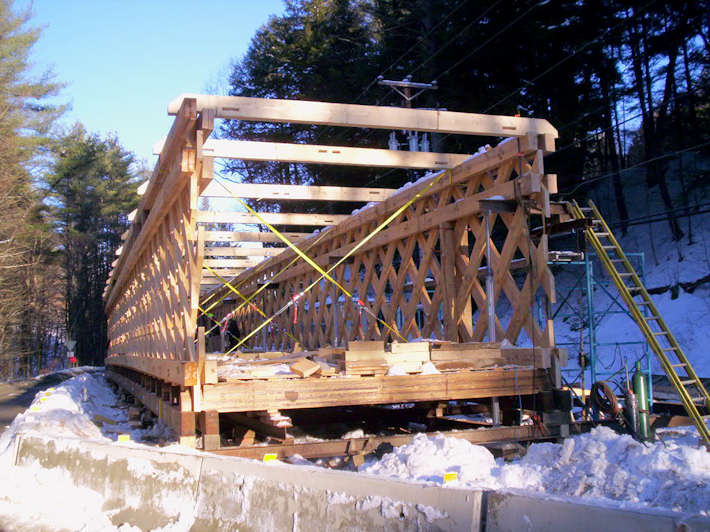
Photo by Jim Ligon
January 21, 2010
New Williamsville Bridge stand, both truses comlete.
The Williamsville Covered Bridge Update: February 2010
February 8, 2010
Hi,
They have the decking done and have made a lot of progress these past few weeks. I am impressed with the work site in that it is picked up and looks quite safe.
I note more deck boards from the old bridge that are pulled up and stacked with nails and lag bolts showing. I would guess that the first layer of decking on the old bridge is 50% gone. Tom Lacky says they are removing loose running boards and screws in the old bridge and not replacing them. They are sacrificial members that protect the laminated deck, which we won't need much longer.
Traffic remains quite heavy and I see several dozen cars at each of my visits.
Ray Hitchcock
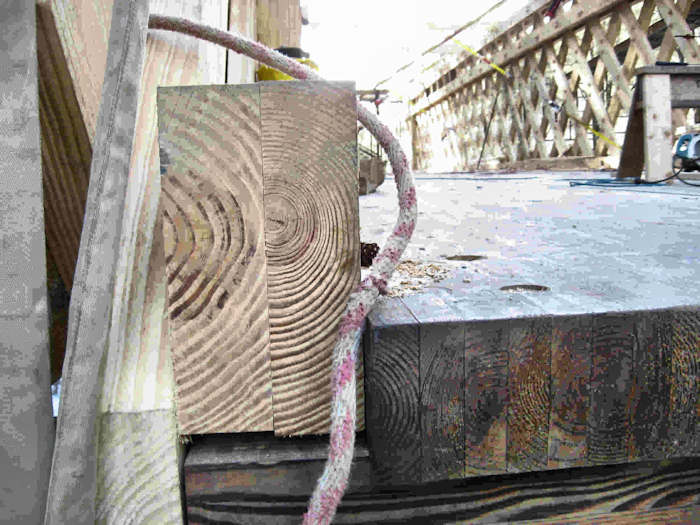
Photo by Ray Hitchcock
February 8, 2010
Decking close-up.
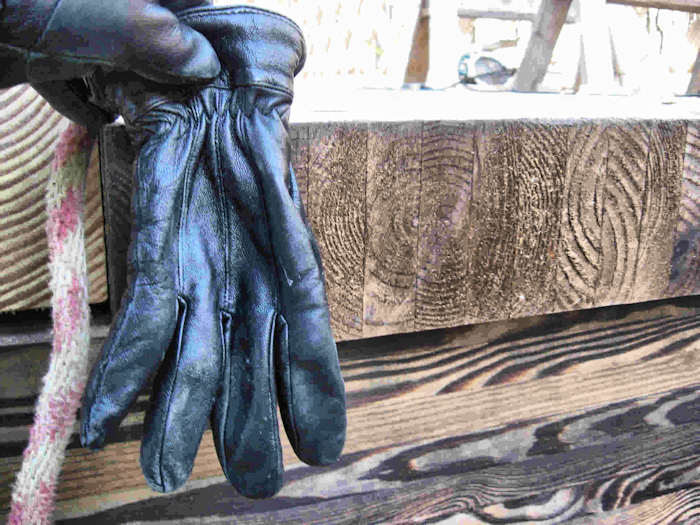
Photo by Ray Hitchcock
February 8, 2010
Decking at the east portal.
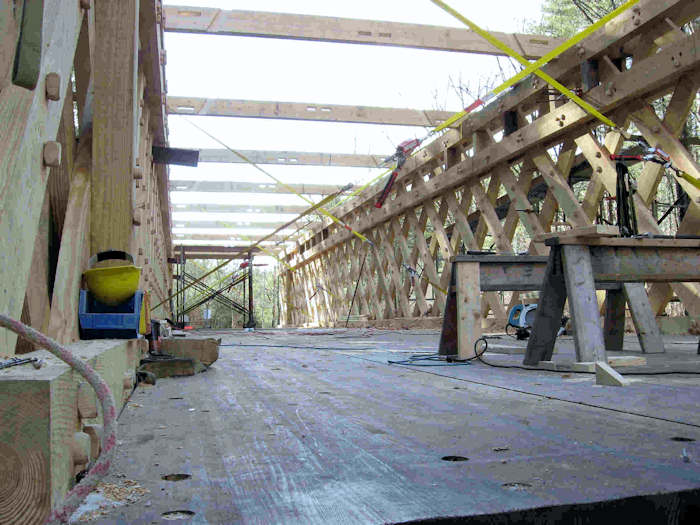
Photo by Ray Hitchcock
January 19, 2010
View through the bridge at deck level.
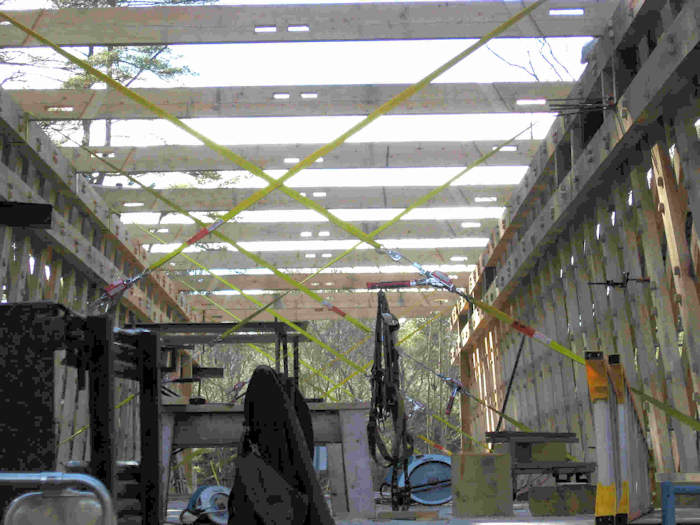
Photo by Ray Hitchcock
February 8, 2010
Tie beams. Note the mortises that will receive the tenons of the upper lateral bracing system.
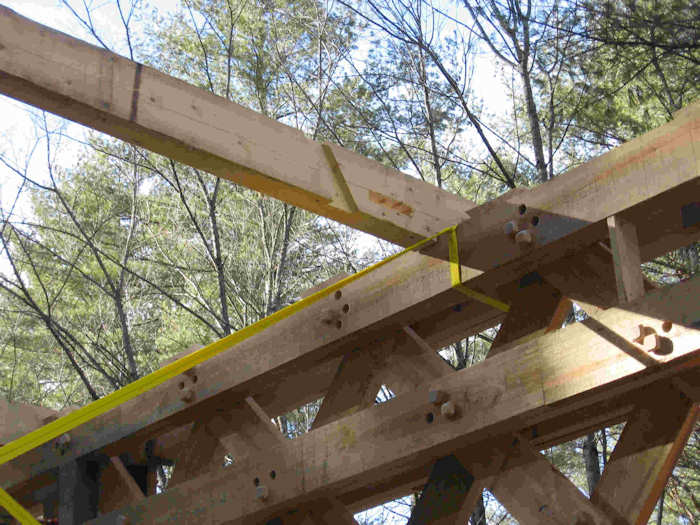
Photo by Ray Hitchcock
January 19, 2010
Note the tie-beam seat atop the upper chord. Also, the empty holes. These will receive trunnels from the outside of the truss.
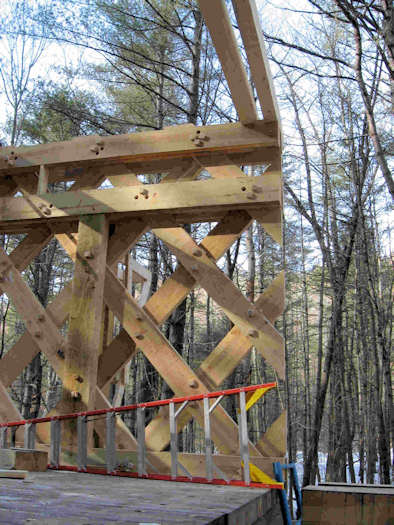
Photo by Ray Hitchcock
February 8, 2010
A view of the upstream truss end.
The Williamsville Covered Bridge Update: March 2010
March 18, 2010
Hi,
I had a nice visit with Jim Ligon today at the Williamsville Bridge. Fortunately he came out of the icy work space to greet myself and a friend I brought along. Ice storms and melting snow have made the grounds around the bridge very slippery.
His crew was busy as beavers and seems to be eager to work on the structure. They were working on the siding today. Note that the siding will not extend to the ends until the bridge is in place. Also fitting the bridge to the footings will await getting the bridge in place as it appears that the footings may be a bit different than the preliminary plans.
As truck traffic is posted off the detour route, Jim plans to move aggressively to put the required decking and railings etc on the detour bridge now rather than have to work nights and weekends when traffic is not posted.
Jim reported that he has held off on finishing the roof until they got clearance from the power company that they would lift the wires when it came time to move. He received that clearance today so work can proceed on the roofing. 3" x 12" white oak needs to be installed for the decking. It looks like they are on schedule and things are moving into place.
Jim noted that they will be allowed to start the support structure work at the edge of the river bed earlier than anticipated as they will be working on ledge and will not disturb the river. We have had a good snow melt off this past week with cool nights. Good for maple sugaring too!
Ray Hitchcock
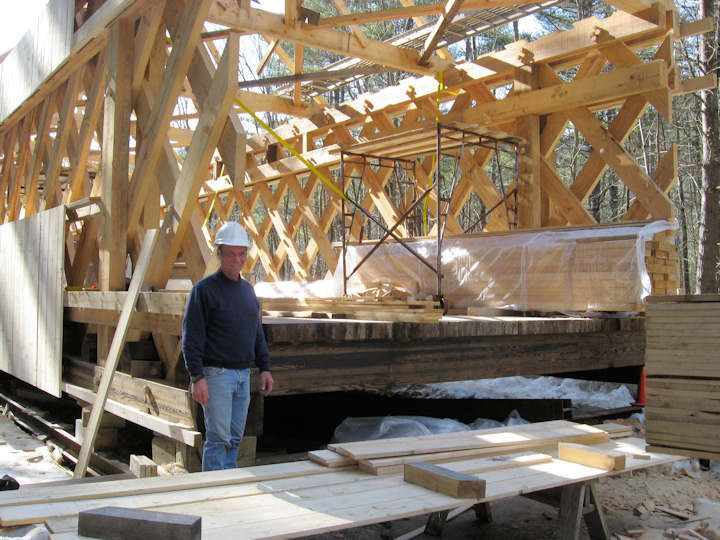
Photo by Ray Hitchcock
March 18, 2010
Williamsville Bridge with Jim Ligon, Alpine Construction foreman.
March 31, 2010
Hi,
Work is proceeding on roof, and siding is done - more to be done when the bridge is in place over the river.
Ray Hitchcock
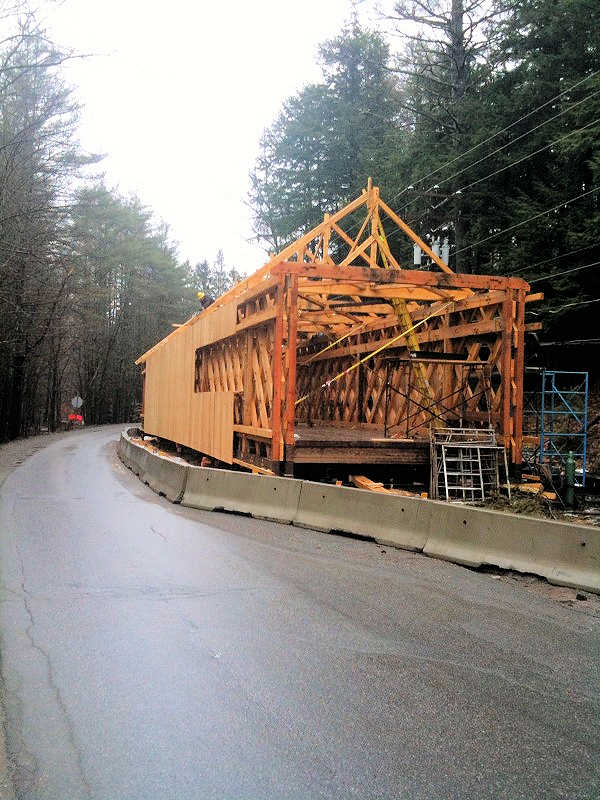
Photo by Ray Hitchcock
March 31, 2010
Work continues on roof.
The Williamsville Covered Bridge Update: May 2010
May 17, 2010
Hi,
Jim Ligon and crew were at the old bridge site today working on the framing under the old bridge. Things appear to be going well with the biggest challenge getting the new bridge to fit on the old footings. Should be quite a show in a few weeks!
Ray Hitchcock
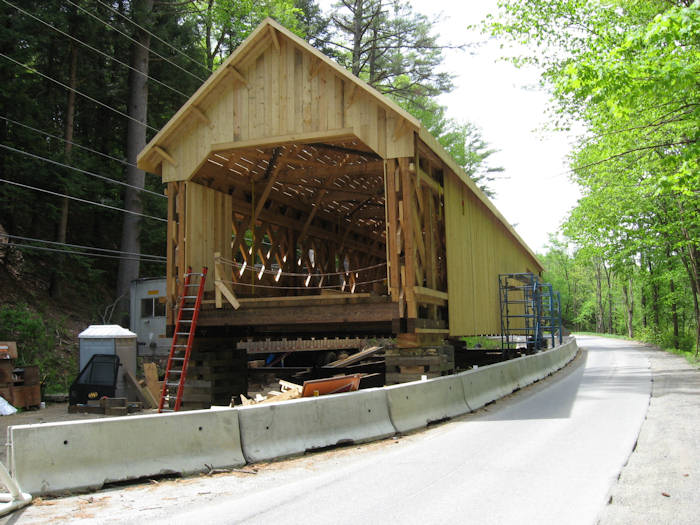
Photo by Ray Hitchcock
May 17, 2010
Whole bridge from east portal.
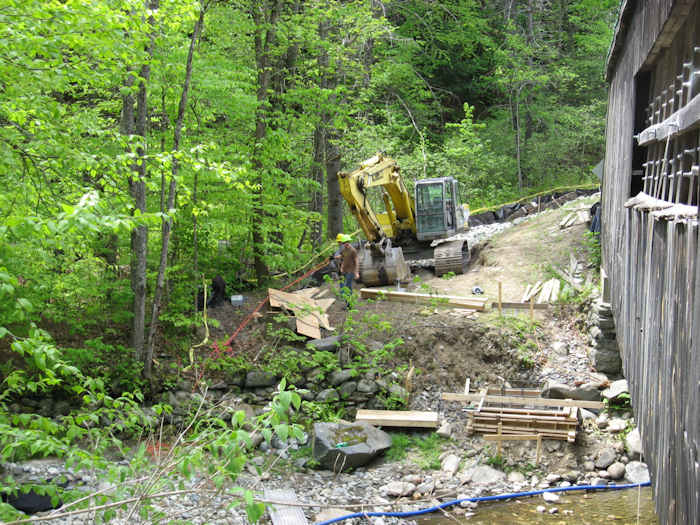
Photo by Ray Hitchcock
May 17, 2010
Prepping the old bridge site for the big move.
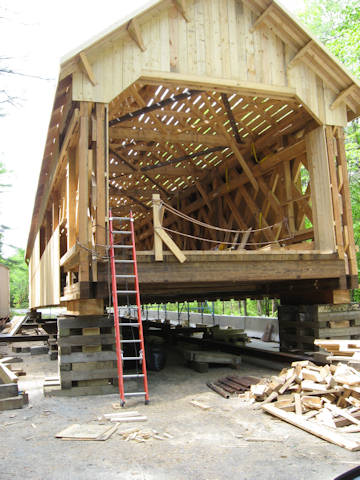
Photo by Ray Hitchcock
May 17, 2010
East portal eaves.
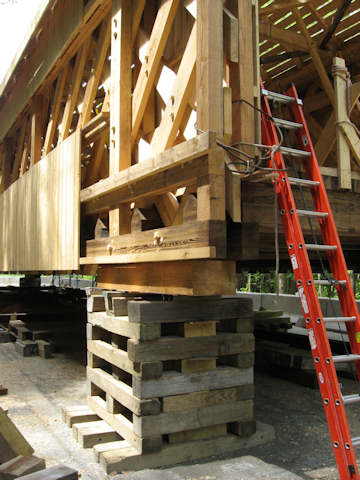
Photo by Ray Hitchcock
May 17, 2010
East portal on cribbing.
The Williamsville Covered Bridge Update: June 2010
June 5, 2010
Hi,
I was passing through the area so caught a picture with the new roof on. I saw some vertical steel support beams underneath the old bridge but did not stop.
Have to admit the new bridge is very handsome!
Ray Hitchcock
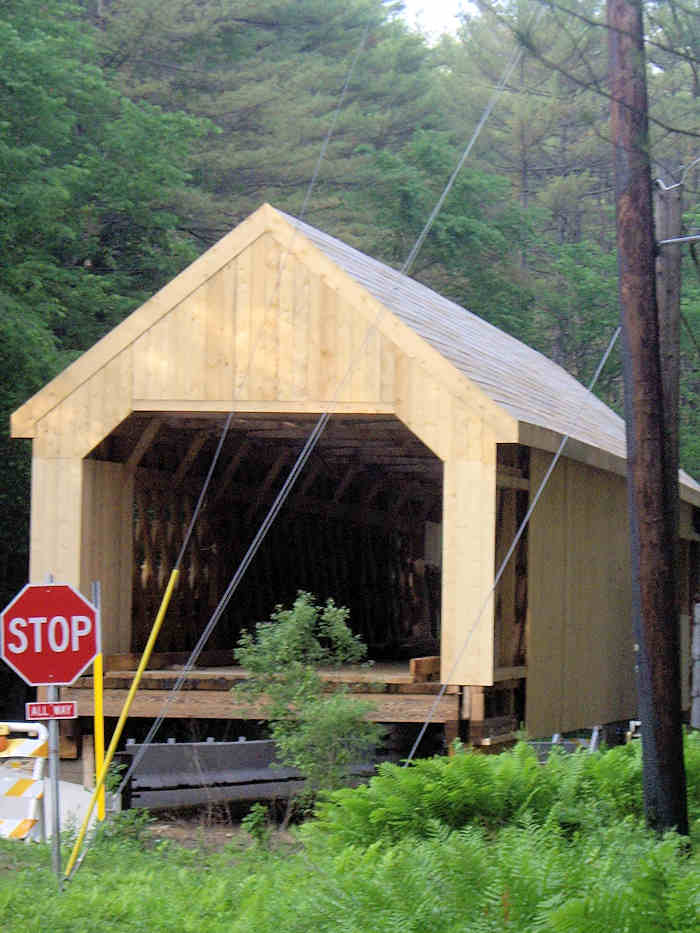
Photo by Ray Hitchcock
June 5, 2010
New roof from west portal.
June 23, 2010
Hi,
The Williamsville Bridge replica is getting its steel standing seam roof while construction of the steel beam scaffolding under the original bridge nears completion.
The scaffolding will be used to slide the old bridge off the river and then to move the replica into its place.
Ray Hitchcock
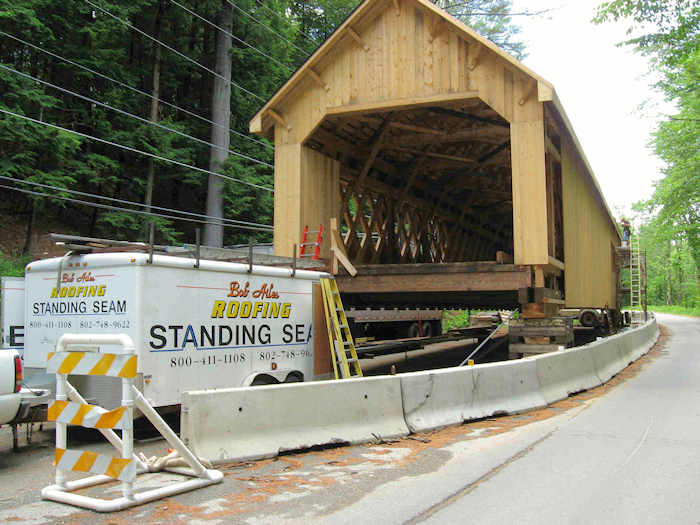
Photo by Ray Hitchcock
June 23, 2010
The standing seam roof contractor at the replica bridge west portal.
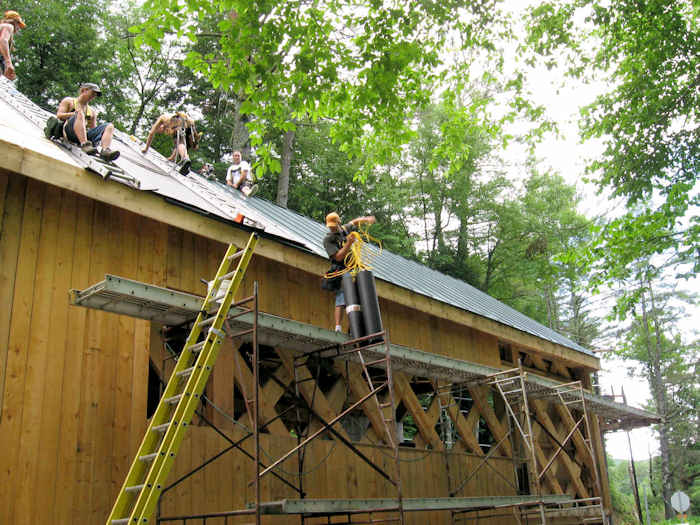
Photo by Ray Hitchcock
June 23, 2010
The standing seam roof installers at the replica bridge.
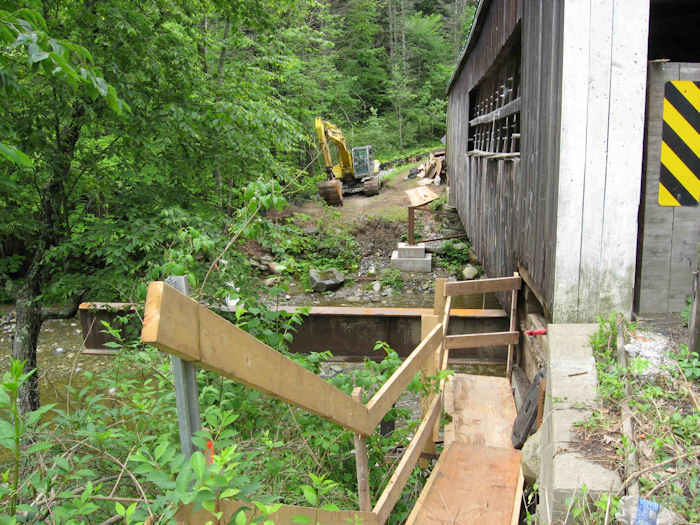
Photo by Ray Hitchcock
June 23, 2010
View of the first scaffold beam and the footing for the second beam on the downstream side of the historic Williamsville Bridge.
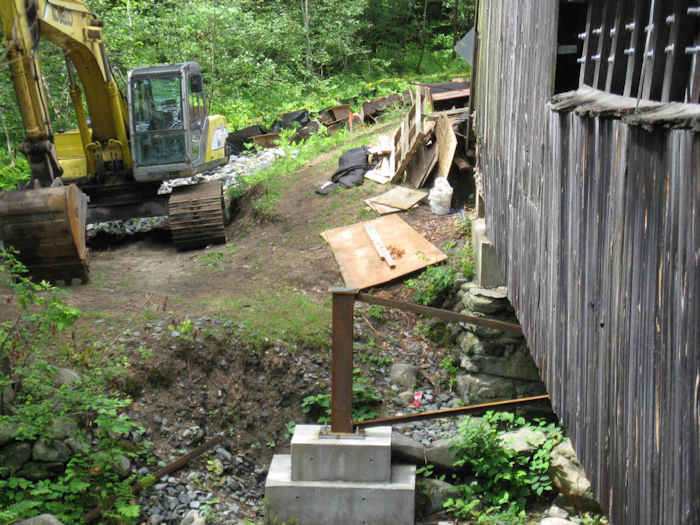
Photo by Ray Hitchcock
June 23, 2010
Close-up veiw of the footing for the second beam on the downstream side.
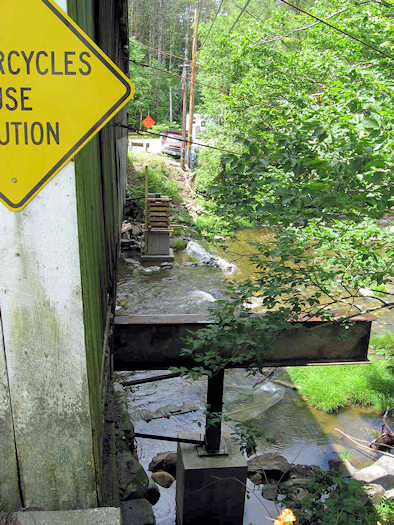
Photo by Ray Hitchcock
June 23, 2010
Upstream scaffolding progress.
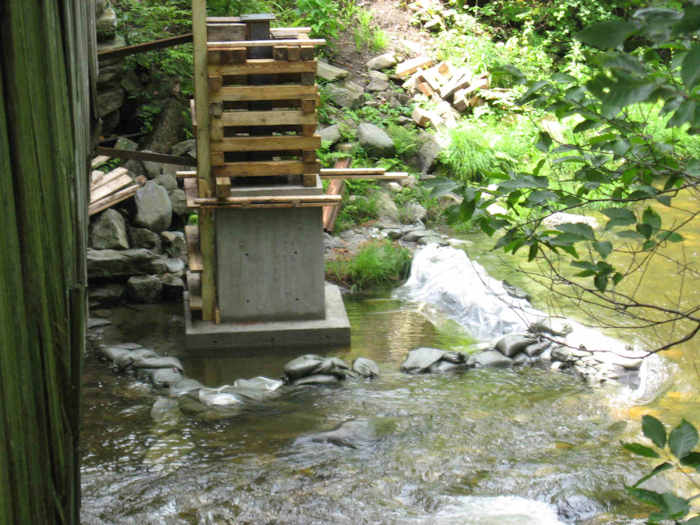
Photo by Ray Hitchcock
June 23, 2010
West upstream footing close-up.
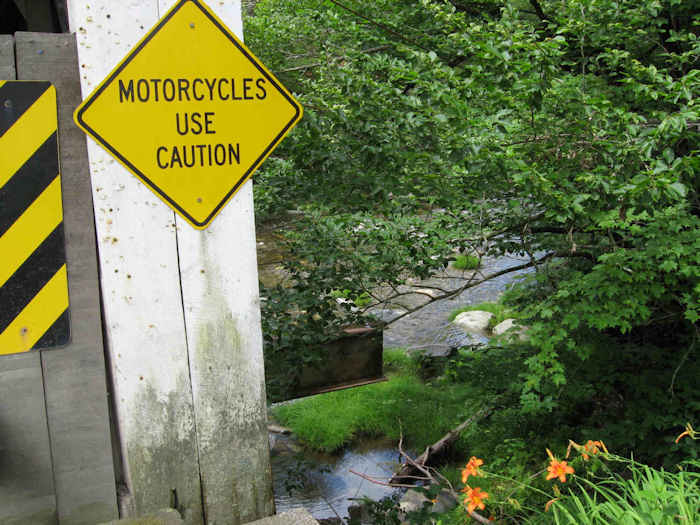
Photo by Ray Hitchcock
June 23, 2010
Motorcycle sign, flowers, and the first scaffolding beam.
The Williamsville Covered Bridge Update: July 2010
July 7, 2010
Hi,
With the replica completed and ready to move, the demolition of the historic Williamsville has begun.
Ray Hitchcock
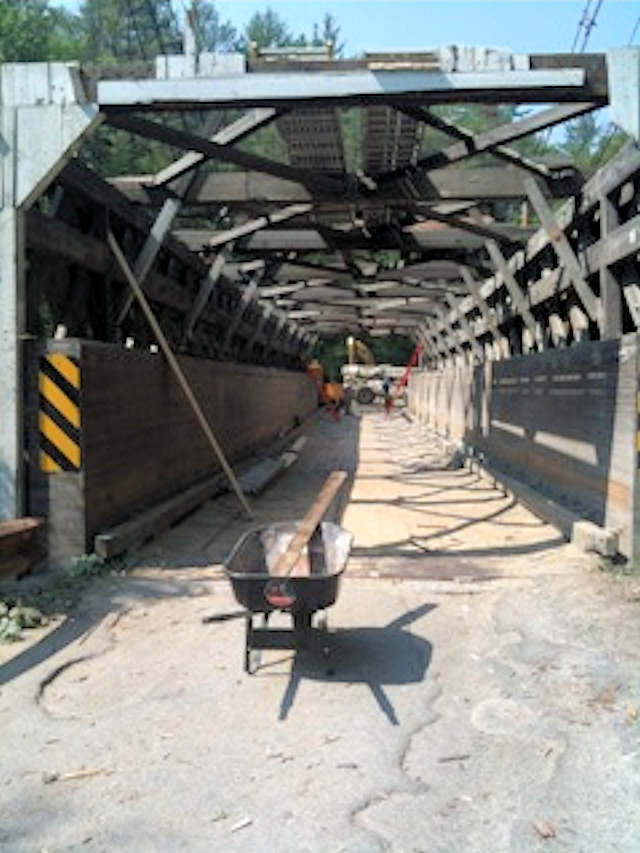
Photo by Ray Hitchcock
July 7, 2010
The demolition of the Historic Williamsville Covered Bridge.
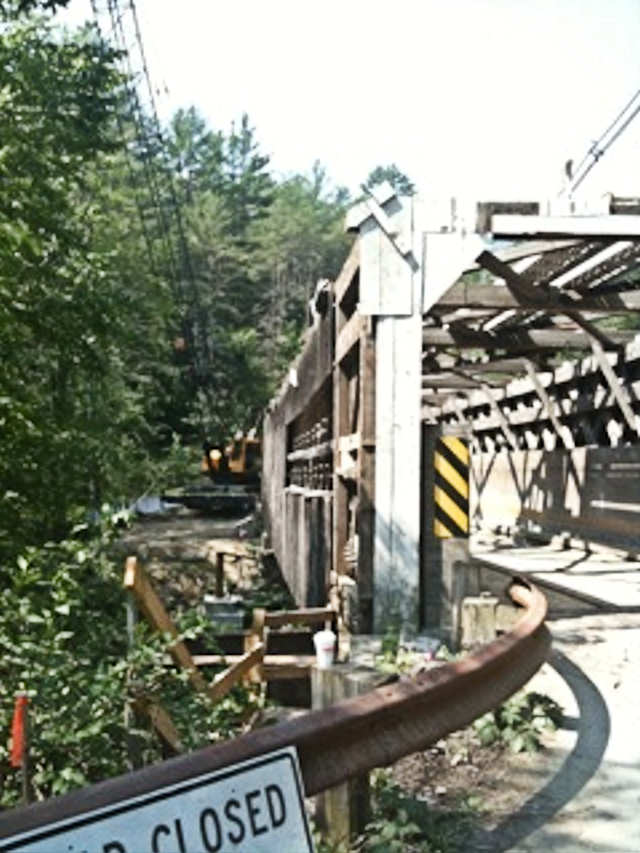
Photo by Ray Hitchcock
July 7, 2010
Roof Gone.
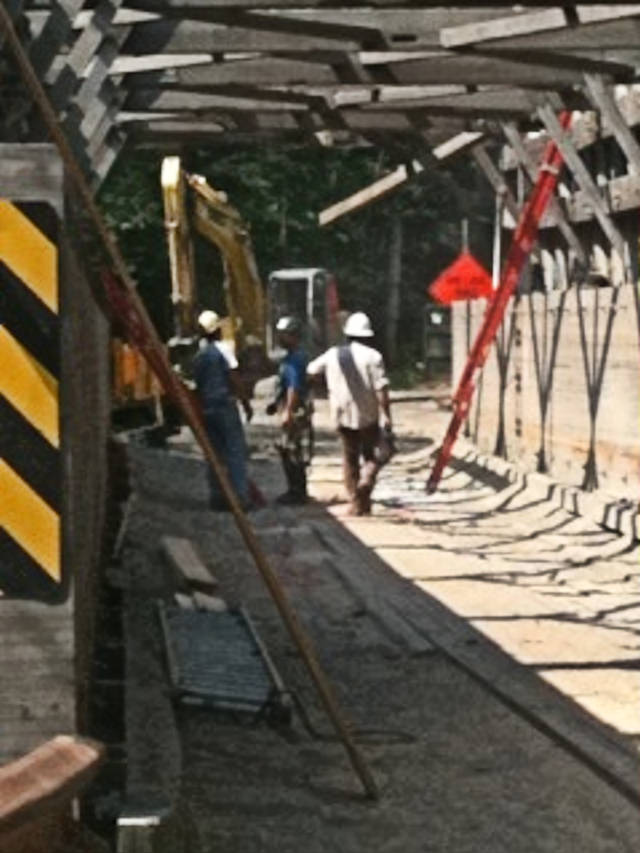
Photo by Ray Hitchcock
July 7, 2010
Glulam supports in full view.
The Williamsville Covered Bridge Update: August 2010
Williamsville Bridge Replica Moves to River - August 2, 2010
WGN 45-13-05#2
Hi,
Gunther Garbe and his wife Elsie live nearby on Newfane Hill Road. They have been following the bridges progress for several months.
Included here are an interesting sequence of pictures of the bridge being moved from its building site to the footings ¼ of a mile down the road. This included some cooperation and delicate work of the cable company to move cables for the tall roof. Finally he shows pictures of the bridge being pushed on rollers on to the temporary support structure.
Jim Ligon indicated that when the bridge is properly leveled and prepared it is possible for a few men to push it on the rollers into place.
His pictures show the bridge being backed by truck to the site. The temporary undercarriage for the 60 +/- ton bridge was from 747 wheels and modified undercarriage.
The trucker was expert in his backing so that final effort to line up the bridge with the temporary footings was less than expected.
Ray Hitchcock
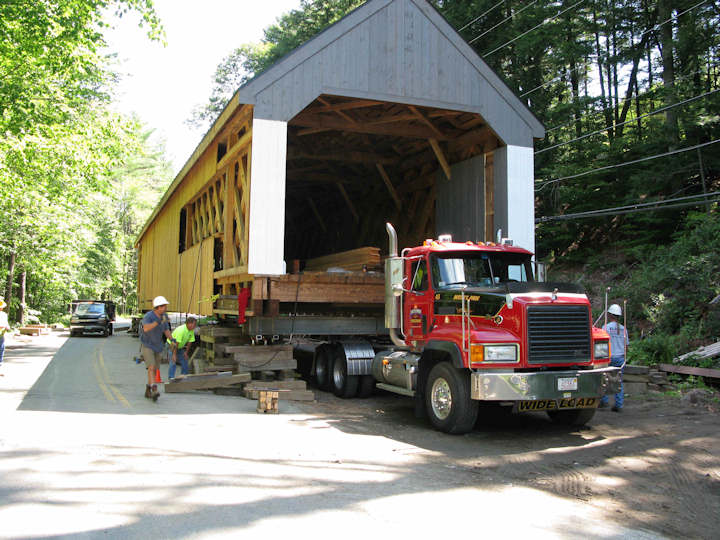
Photo by Gunther Garbe
August 2, 2010
Rollers replace cribbing as the west portal end of the bridge is settled onto the truck.
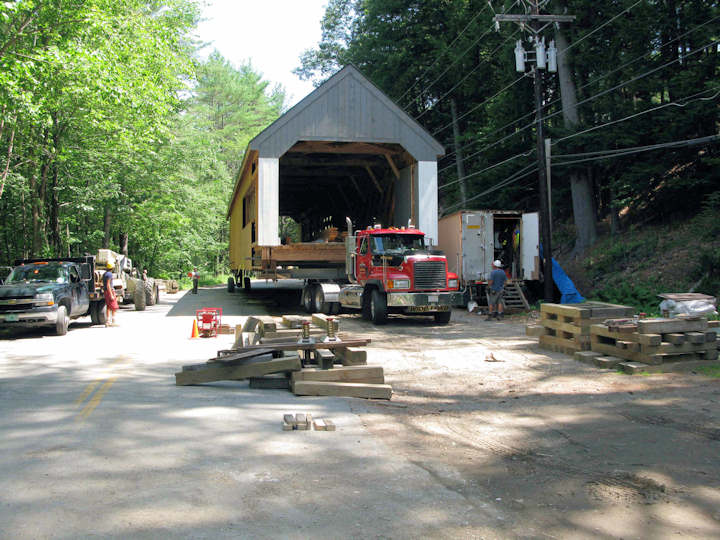
Photo by Gunther Garbe
August 2, 2010
The truck backs the bridge onto the road.
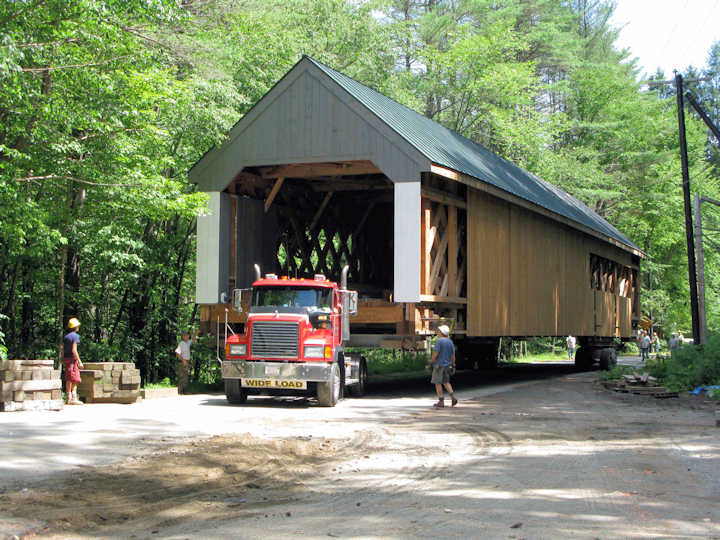
Photo by Gunther Garbe
August 2, 2010
Moving right along.

Photo by Gunther Garbe
August 2, 2010
Approaching overhead wires.
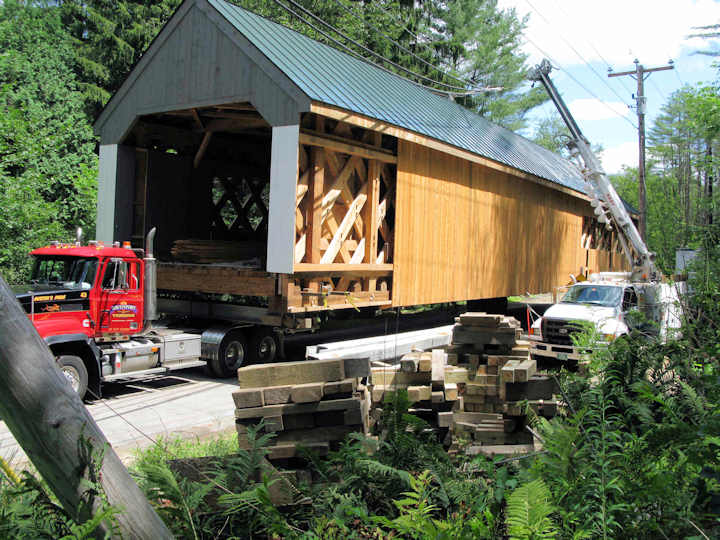
Photo by Gunther Garbe
August 2, 2010
Bridge passes under wires.
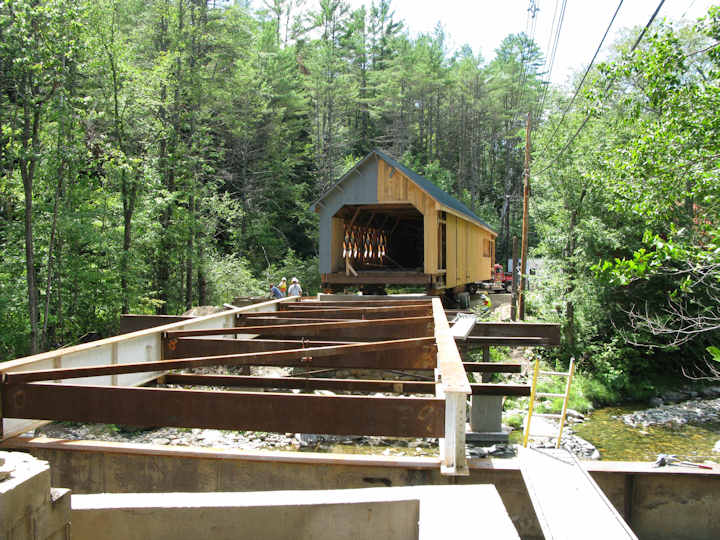
Photo by Gunther Garbe
August 2, 2010
View from the east as truck backs the bridge to the scaffolding.
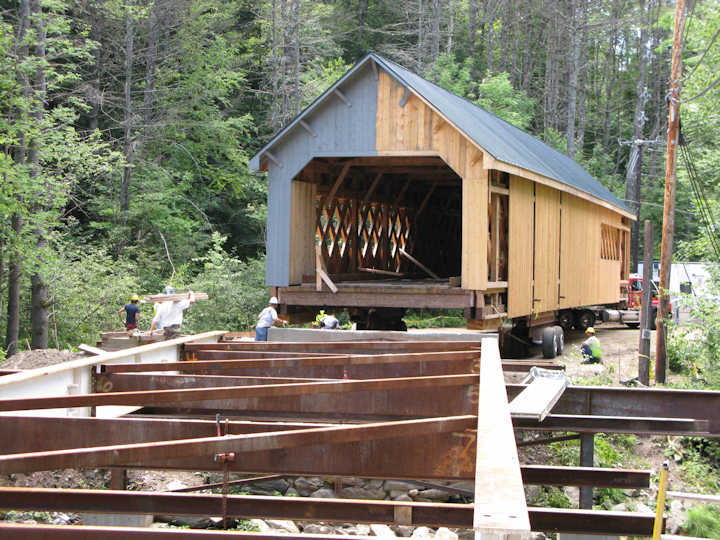
Photo by Gunther Garbe
August 2, 2010
Aligning to the scaffolding.
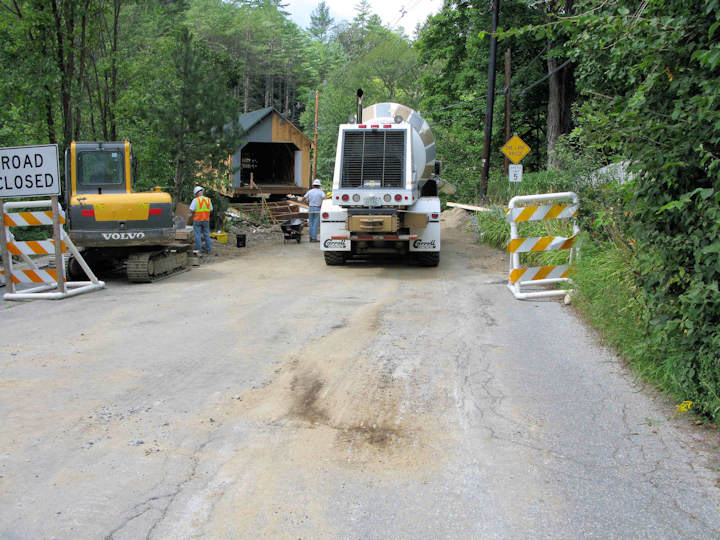
Photo by Gunther Garbe
August 2, 2010
Replica bridge moving along scaffolding.